by Kim MacMillan
(from the 1993 Fall issue of The American Trakehner)
Over the past four years as we waited for our young Trakehners to grow up enough to be put under saddle, we discovered that there was a way to enjoy showing them even before we could ride them: showing them in hand. Not only did this give us something to do as we waited, but it also provided excellent groundwork and exposure to showing for the young horse and much-needed promotion for our fledgling breeding operation.
We set out to learn the proper way to show our horses in hand and found out there was very little written information available. We read the ATA’s Stallion Prospect Preparation manual, which does have some good information in it for anyone preparing to show a horse, whether it be a stallion prospect or not. Beyond that, we went to watch several breed shows and asked people who had been showing horses in hand to teach us the basics (if you do this, make an appointment with them ahead of time, don’t expect them to take time out at a show when they are busy).
Hopefully, this article and the video produced by the United States Dressage Federation will make learning easier for you than it was for us. It can really be a lot of fun, as well as great exercise.
Proper showing in hand, like anything else, takes preparation, but it is worth it in terms of what you will get back in the satisfaction of showing your horse to his best advantage. You may have a very nice horse, but a judge can only place what he or she sees. If you don’t show off your horse’s conformation, movement or temperament to his best advantage you may not place as high as you possibly could.
Following is a synopsis of a clinic given by Eberhard Biesenthal in May near Harvard, IL, on Brad and Mary Jackson’s farm. Eberhard volunteered his time for this clinic sponsored by the MidWest Trakehners, and we all wish to thank him for his help.
Eberhard Biesenthal was born and raised in Lower Saxony in Germany. His father still breeds German riding ponies which Eberhard helped train and show until he outgrew them. He came to the United States in December 1987 to work for Christina Glass in Ohio until she sold her farm and is now the trainer at John and Marilyn Krenger’s Sanctuary Farm in Woodstock, IL. Eberhard and his wife Judy own two purebred Trakehner geldings, Artus by Graditz, out of Alma Maid by Mazagran and Avinin by Graditz, out of Astoria III by Halali.
Eberhard started off the clinic by emphasizing that you should start early, practicing at home and teaching your horse manners. “Take your time and don’t rush. Also, don’t exhaust yourself or your horse, take breaks.”
“It helps a lot to have two people, one at the horse’s head and one behind with a long whip. The person should tap the horse’s hind feet down low once if the horse needs help learning to trot,” said Eberhard.
He continued, “Try to expose your horse to a new environment, show him flowers, cars, and other horses. Remember, even if you are best prepared, things can still go wrong.”
One important point that he stressed was that you need to know your own physical abilities. If you can’t keep up with your horse, get someone else to show it to you. Maybe you can show it as a weanling or yearling, but if you can’t keep up with its trot then you need to find someone who can.
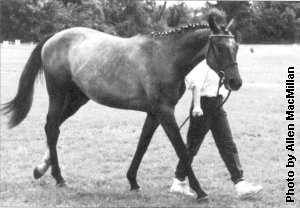
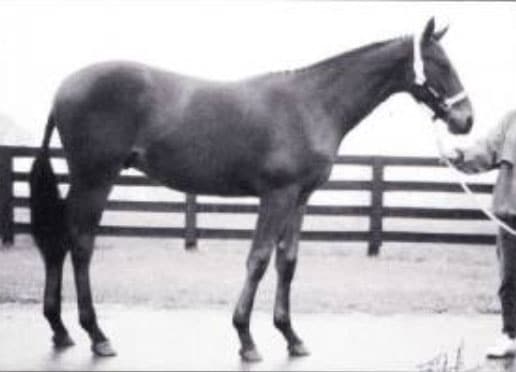
Start to teach your horse to lead and to walk in a halter, carrying a dressage whip to help with steering and to encourage him to go forward. You want your horse to walk out, with a long, relaxed stride and a “swinging” back. (see photo 3)
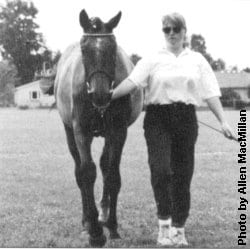
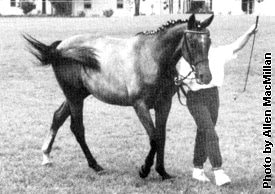
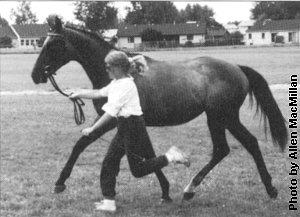
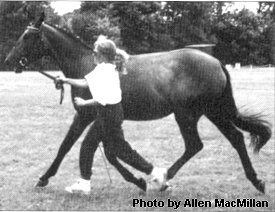
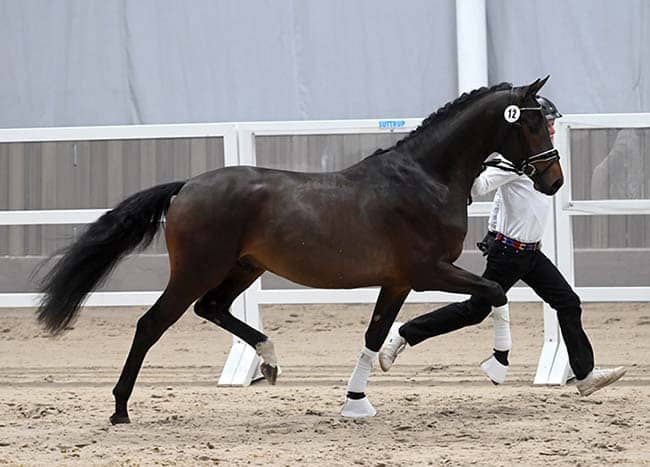
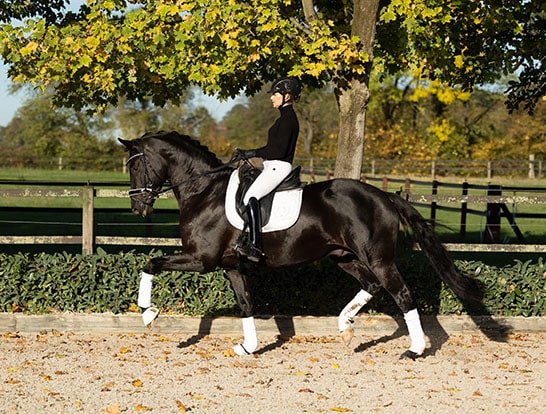
At the trot, you again want your horse to move forward willingly. It is important that you don’t hang on your horse’s head. According to Eberhard, two things happen if you hand on your horse while moving alongside him. One, the horse’s head comes up and he hollows out his back and, two, you restrict the horse’s forward movement. (see photos 4 and 5)
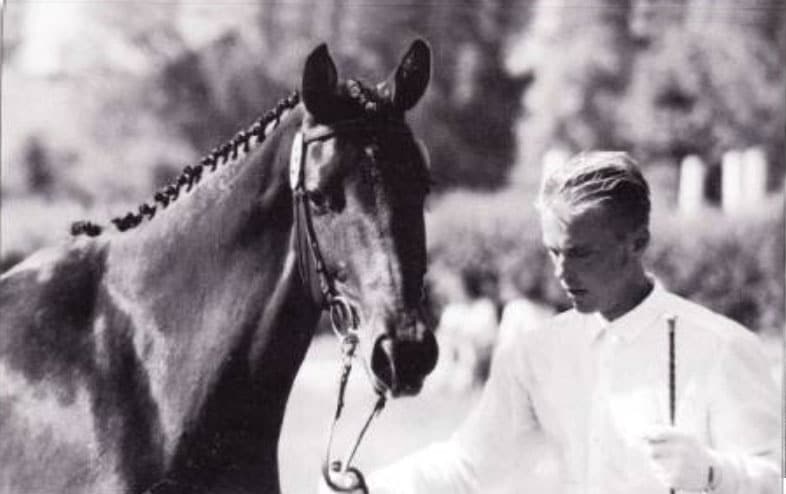
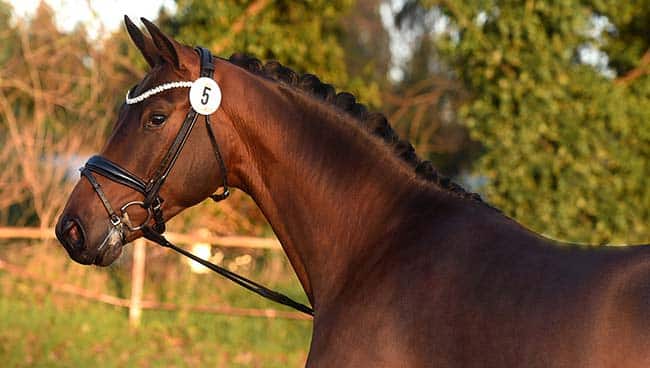
So, keep the lead shank or reins loose enough that you are not restricting his head and hold your hand up a little so you don’t pull down. Also, keep your hand under the horse’s chin, not pulling toward you when you are traveling in a straight line. If you pull your horse’s head toward you, then he will become crooked and his body and feet will not travel in a straight line. (see photos 1 and 2)
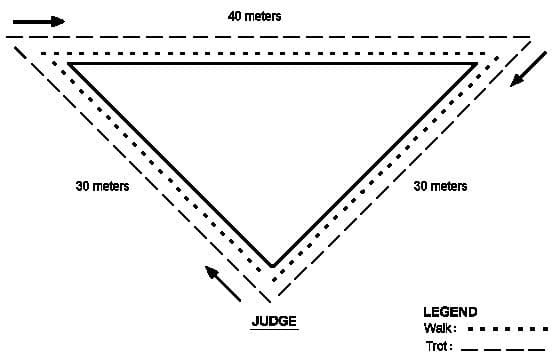
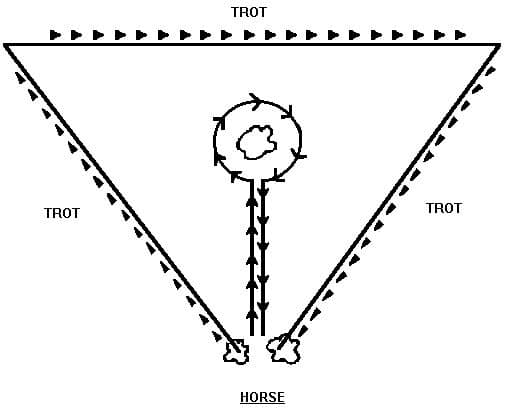
Eberhard then explained the triangle pattern used for showing your horse in hand (see Figures A, B, and C). You are supposed to stand horse up for examination by the judge at the point of the triangle when you first walk in the ring and, depending on the judge’s preference, you may be asked to do this again after you trot the triangle.
The correct stance is with the horse’s foreleg on the side nearest the judge to be slightly ahead of the other foreleg and the horse’s hindleg nearest the judge to be slightly behind the horse’s other hindleg (this is called an open stance). The horse should be standing over the top of his feet and not have his forelegs too far underneath him or his hindlegs trailing out behind him. Another way to look at it is that the legs on the side nearest the judge should be pointing straight toward the ground. This stance allows the judge to see all four legs at the same time.
The horse should look ahead with his head and neck slightly raised and extended, and he should look alert with ears forward. Eberhard said that you could use your whip behind your back or crumple some paper in your hand to get your horse to look forward and alert.
If necessary, try to find a high spot to stand your horse’s front end on, so that he appears to be an “uphill” horse, with his withers higher than his croup. As the judge walks around the horse to look at the other side, step the horse up a step to change the legs to the open stance on the other side. Don’t crowd the judge, but it is alright to walk forward a few steps to a better place for setup or into a better stance.
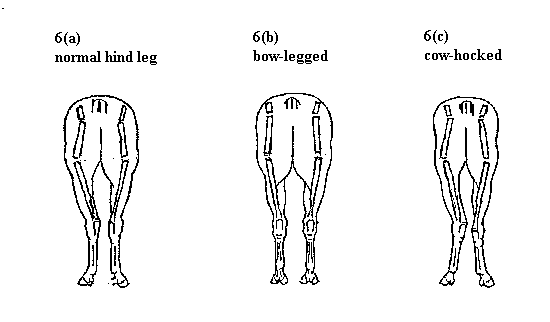
The judge will also look at your horse from the front and the back as he travels around. For this try to have your horse’s feet set up square and closer together (bring the feet up to get more of a square stance) so the legs look straighter (not toeing in or out or cow hocked).
Eberhard said it is better to walk a horse forward into a stance rather than backing him up into it. Backing up too much can make a horse appear shorter. If you do make small adjustments backward, it is better to push a little on the horse’s chest instead of pulling his head backward, as he may object to this by putting his head up in the air or fussing; however, if you have a long-backed horse, you might want to back up. If you have a short horse, you might want to stand him stretched out a bit; if your horse is small, get him excited about something and he will appear bigger.
After setting your horse up at the point of the triangle, you either walk your horse around the large triangle (Figure A), walk around the shorter triangle (Figure B), or walk away from the judge into the center of the triangle and then straight back (Figure C), depending on the setup of the ring and the preference of the judge. When you walk the horse away from and back to the judge, it is to show off straightness, not a big walk. The long side of the triangle should show off the horse’s big walk.
Then you trot your horse around the triangle. Again, the short sides going away from and back toward the judge are to show off straightness. Eberhard advised not to go all out on these sides, because you don’t want your horse to make wide movement when starting out or to leave his hind end trailing out behind. The long side of the triangle is where to show off the horse’s brilliant trot.
He also said that a good trot should start from behind and the first few steps of the trot are very important. You should not run around the corners of the triangle – trot one side, walk the corner and trot the next side, and so on. If you run around the corners the horse will get ahead of you and you will get disorganized. If the horse canters, don’t panic, bring him back, maybe even to a standstill, and start over again.
Some judges will have all or some of the horses come back in together and walk around (this may happen in large classes, group or championship classes, or at stallion inspections). When the judge is looking at you it is important to walk big, according to Eberhard. He said to keep enough space between your horse and the horse in front of you. You can walk deep into the corners to gain space if need be and hold back when the judge is not looking so that you can walk out again when he does look at you.
Eberhard said that for foals and yearlings a halter to show in is OK, but he prefers to use a bridle on yearlings because it looks better and you have better control. A bridle must be used on two-year-olds and older horses. You may use reins or a lead shank attached to the bridle. If you use reins, you divide the reins with your index finger.
Eberhard starts horses out in a French snaffle. He also said not to use a noseband on the bridle if your horse has a nice head, but if his nose is long and he has a plain head, then use a noseband. Don’t use a flash or dropped noseband when showing in hand.
When showing a mare and foal, have the most experienced handler showing the mare. This is so that the mare handler can regulate the mare’s speed which will, in turn, regulate the foal’s speed. For example, if the mare goes too fast, the foal may panic and rush ahead and canter instead of showing off his trot
The horse and handler must be well turned out, neat and clean. Braiding the horse is a good idea. For showing Trakehners, black pants and a white shirt is the suggested attire. He also stressed that you wear shoes that you can run in, such as a good pair of tennis shoes, not riding boots, you can’t run fast enough in them.
When you get to the show, watch to see what kind of horses the judge likes and how he or she conducts the class. Also, scout out the ring you will be showing in and look for a high spot to set your horse up on. Use all of this information to form a plan for the showing, don’t wait to see what the others do.
